
First Things First: Can You Paint a Kayak?
If you’ve been staring at your old, faded kayak and wondering if a fresh coat of paint could bring it back to life, you’re not alone! Many kayak owners consider painting their watercraft to restore its look or add a personal touch. But before you grab a paintbrush, let’s answer the big question—can you actually paint a kayak?
The good news is yes, you can paint a kayak, but there are a few things to keep in mind. The material of your kayak plays a major role in how well the paint adheres and how long it lasts.
Types of Kayaks That Can and Cannot Be Painted
Kayaks are typically made from different materials, and not all of them take paint the same way. Here’s a quick breakdown:
✅ Plastic (Polyethylene) Kayaks – These are the most common and also the trickiest to paint. Since polyethylene is a slick, non-stick material, regular paint won’t bond well without proper surface preparation. Sanding and using a good primer are musts!
✅ Fiberglass Kayaks – Much easier to paint! Fiberglass surfaces hold paint well, especially if you use marine-grade options. A bit of sanding and a good primer will help the paint stick better.
✅ Wooden Kayaks – These are the easiest to paint. They naturally absorb paint and sealants, allowing for smooth, long-lasting finishes.
❌ Inflatable Kayaks – Sorry, but painting an inflatable kayak isn’t a good idea. The flexible material won’t hold the paint properly, and it can peel or crack when inflated or deflated.
Common Concerns: Will the Paint Stick? Will It Affect Performance?
A major concern when painting a kayak is whether the paint will stay on after exposure to water, sun, and rough handling. The key is choosing the right paint and preparing the surface properly. If done correctly, a good paint job can last for years without chipping or peeling.
Performance-wise, painting your kayak won’t make a noticeable difference in speed or maneuverability. However, using a thick, uneven layer of paint or skipping the sealing step might make the surface rougher, creating extra drag in the water.
Now that we know it’s possible to paint a kayak, let’s talk about the best type of paint to use!
What Paint Should You Use on a Kayak?
Picking the right paint is crucial if you want your kayak to look great and withstand the elements. Since kayaks are constantly exposed to water, UV rays, and rough surfaces, you need a durable, waterproof, and UV-resistant paint that won’t chip or fade easily.
Best Types of Paint for Kayaks
- Marine-Grade Paint – The best option for long-lasting durability. Designed for boats, this paint is resistant to water, sun damage, and wear. It’s a bit pricier but worth it for a professional finish.
- Epoxy-Based Paint – A great choice for fiberglass and wooden kayaks. It forms a tough, waterproof coating that resists scratches and peeling. It’s also highly durable, but make sure to apply a clear sealant for added protection.
- Spray Paint (for Plastics) – If you’re painting a polyethylene kayak, look for spray paints labeled “for plastic” or “fusion for plastic.” These are designed to bond better to slick surfaces. They may not last as long as marine paint, but they’re a quick and budget-friendly option.
Recommended Brands & Budget-Friendly Options
If you want premium quality, here are some trusted brands:
✔ TotalBoat Wet Edge – A marine-grade paint perfect for fiberglass and wooden kayaks.
✔ Rust-Oleum Marine Coating – Affordable and great for DIY projects.
✔ Krylon Fusion All-In-One – A spray paint made specifically for plastic kayaks.
For those on a budget, Krylon Fusion and Rust-Oleum offer solid performance at a lower price point, though they may need more frequent touch-ups.
No matter what paint you choose, always finish with a clear UV-resistant topcoat to extend the life of your paint job. It acts as a protective shield against fading, peeling, and scratches!
Now that you know what paint to use, let’s move on to why you might want to paint your kayak in the first place!
Why Would You Paint a Kayak, Anyway?
If you’re wondering whether painting your kayak is worth the effort, the answer depends on what you’re looking to achieve. While kayaks are built to withstand the elements, they don’t stay in perfect condition forever. A fresh coat of paint can do more than just improve its appearance—it can add protection and even enhance safety on the water.
Let’s take a look at some of the biggest reasons why you might want to paint your kayak.
Restoring an Old or Faded Kayak
Over time, exposure to sunlight, water, and general wear can leave your kayak looking dull and worn out. Instead of spending money on a brand-new kayak, a good paint job can bring it back to life. Whether it has scratches, scuffs, or fading, a fresh coat of paint can make it look as good as new—or even better!
Customizing for a Unique Look
Your kayak should feel like your own, and painting it is one of the best ways to personalize it. Whether you want bold colors, sleek designs, or even camouflage for fishing trips, painting gives you endless possibilities. Adding stencils, decals, or artistic patterns can turn your kayak into a one-of-a-kind masterpiece.
Improving Visibility for Safety
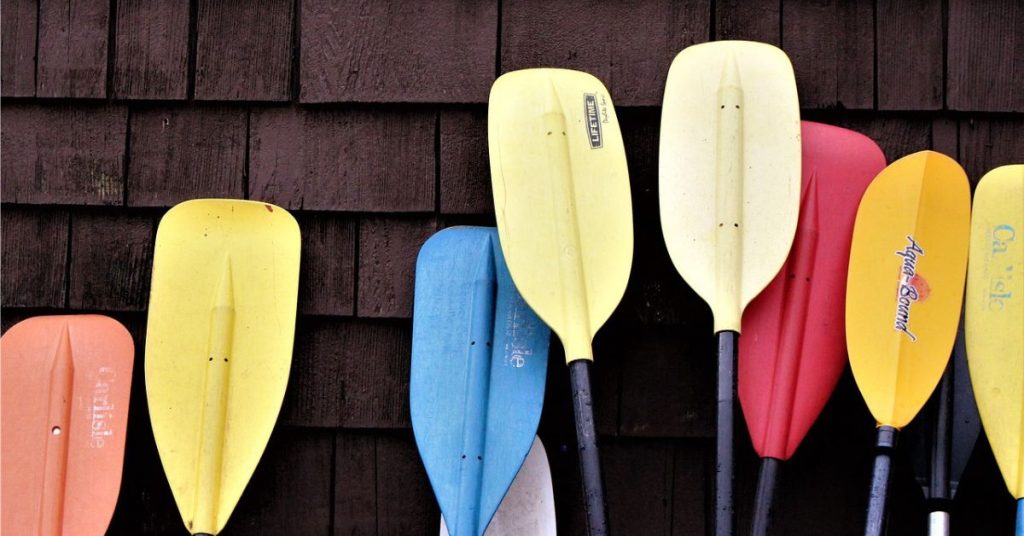
If you paddle in open water, rivers with boat traffic, or during low-light conditions, visibility is key to staying safe. Bright colors like orange, yellow, or neon green make your kayak easier to spot, helping prevent accidents. If your current kayak is a dark or dull color, adding high-visibility paint or reflective strips can make a big difference in safety.
Adding a Protective Layer Against UV Damage and Wear
Just like your skin needs sunscreen, your kayak needs protection from harsh UV rays that can weaken its material over time. A high-quality, UV-resistant paint acts as a protective barrier, helping to prevent cracking, fading, and sun damage. Additionally, a durable clear coat can shield against minor scratches and dings from rocks, sand, and general use.
Painting your kayak isn’t just about looks—it’s also a great way to extend its lifespan and improve safety on the water. Whether you’re restoring an old kayak, making it more visible, or adding a personal touch, a well-done paint job can be both aesthetic and practical.
Now that you know why painting a kayak is a great idea, let’s move on to the supplies you’ll need to get started!
What You Will Need: Kayak Painting Supplies List
Before you start painting your kayak, it’s important to gather all the right materials. Having everything on hand will make the process smoother and help you achieve a clean, professional-looking finish. Here’s a complete list of what you’ll need, from essential tools to optional extras for customization.
Essential Tools and Materials
✔ Paint – Choose a durable, waterproof paint that suits your kayak’s material. Marine-grade, epoxy-based, or plastic-friendly spray paint are great options.
✔ Primer – If your kayak is made of plastic or fiberglass, a primer will help the paint bond better and last longer. Look for a primer designed for marine use or plastic surfaces.
✔ Sandpaper (80- to 220-grit) – Lightly sanding the kayak removes old paint, smooths the surface, and improves paint adhesion.
✔ Masking Tape – Use this to cover areas you don’t want painted, like handles, seats, or any branding you want to keep visible.
✔ Cleaning Supplies – Mild soap, water, and rubbing alcohol or acetone help remove dirt, grease, and debris before painting.
✔ Paintbrushes/Rollers/Spray Gun – Depending on your chosen paint, you’ll need the right applicator. Spray paint is best for even coverage, but rollers and brushes work well for detailed designs.
✔ Clear Coat (Sealant) – A UV-resistant clear coat helps protect your paint job from fading, scratches, and wear over time.
Protective Gear and Safety Precautions
✔ Gloves – Protect your hands from paint, chemicals, and sanding dust.
✔ Mask or Respirator – If you’re using spray paint or working in an enclosed area, wear a mask to avoid inhaling fumes.
✔ Safety Glasses – Prevent dust, paint, or chemicals from getting into your eyes while sanding or painting.
✔ Drop Cloth or Plastic Sheeting – Protect the ground or surrounding surfaces from paint drips and overspray.
✔ Well-Ventilated Workspace – If working indoors, make sure there’s proper airflow to avoid breathing in strong fumes.
Optional Supplies for Customization
✔ Stencils & Decals – Want to add patterns, logos, or unique designs? Stencils help create clean, detailed artwork, while decals can give your kayak a professional finish.
✔ Reflective Tape – Adding reflective strips improves visibility in low-light conditions, increasing safety.
✔ Wax or Polish – After painting, applying a marine wax or polish can add shine and extra protection.
✔ Painter’s Markers or Fine Brushes – Perfect for small details, lettering, or touch-ups.
Gathering the right materials before you start will make painting your kayak easier, safer, and more effective. With the right paint, tools, and a bit of creativity, you’ll be able to transform your kayak into something that looks brand new and uniquely yours.
Now that you have everything you need, let’s dive into the step-by-step process of painting your kayak!
How to Paint a Kayak: Step-by-Step Guide for Beginners
Painting a kayak may seem like a big task, but with the right approach, you can get great results—even if it’s your first time! Follow this step-by-step guide to ensure a smooth, durable, and professional-looking finish.
Step #1: Prepare the Area
Before you begin painting, it’s essential to set up the right workspace. The right environment will make the job easier and prevent dust, dirt, or debris from ruining your fresh paint.
✅ Choosing the Right Workspace
- Outdoor Setup: Painting outdoors is ideal since it provides natural ventilation, but be sure to pick a calm day with no strong winds or excessive humidity.
- Indoor Setup: If you’re painting inside a garage or workshop, make sure the space is well-ventilated to avoid inhaling fumes. Open windows and use fans if necessary.
✅ Protecting the Area
- Lay down a tarp, plastic sheet, or old newspapers to catch any paint drips.
- If you’re spray painting, make sure there’s enough space around the kayak to prevent overspray from hitting walls or other objects.
Step #2: Strip It Down
To get a smooth, even paint job, you’ll need to remove any parts that don’t need painting.
✅ What to Remove:
- Seats, footrests, handles, bungee cords, and other accessories should be taken off before painting. This ensures that the paint reaches all necessary areas and avoids messy edges.
- If some parts cannot be removed, cover them with masking tape or plastic wrap.
✅ Mask Off Areas You Don’t Want to Paint
Use painters’ tape to cover:
- The cockpit area
- Drain plugs
- Any logos or decals you want to keep visible
Taking the time to do this now will save you cleanup work later!
Step #3: Clean the Kayak and Sand It Down
A clean surface is essential for proper paint adhesion.
✅ Wash the Kayak Thoroughly
- Use mild soap and water to remove dirt, grime, and grease.
- For stubborn spots, use rubbing alcohol or acetone to break down oils or sticky residue.
- Let the kayak dry completely before moving on.
✅ Sand the Surface
- Use 80- to 220-grit sandpaper to lightly scuff the entire surface.
- Sanding helps the paint bond better and removes any glossy finish that might cause peeling.
- Wipe away excess dust after sanding.
Step #4: Wipe It Clean (Again!)
Even small amounts of dust or debris can ruin your paint job, so it’s important to do a final wipe-down.
✅ How to Do It Right:
- Use a clean microfiber cloth to remove any remaining sanding dust.
- Wipe the kayak down with rubbing alcohol or acetone to ensure a spotless surface.
- Let it dry completely before painting.
Step #5: Paint the Kayak
Now for the fun part—painting!
✅ Applying a Primer (If Needed)
- If you’re painting a plastic kayak, apply a plastic primer to help the paint bond better.
- For fiberglass or wooden kayaks, a marine-grade primer works best.
Let the primer dry according to the instructions before applying paint.
✅ Choosing a Painting Method
- Spray Paint: Best for smooth, even coverage. Hold the can about 8-12 inches away and apply in light, even strokes.
- Brush or Roller: Great for detailed designs or small sections. Use thin coats to avoid streaks.
✅ Layering for the Best Finish
- Apply multiple thin coats instead of one thick coat. This prevents drips and ensures even coverage.
- Allow each coat to dry completely before applying the next one (usually 15-30 minutes, depending on the paint).
Step #6: Apply a Clear Coating
Once you’re happy with the paint job, it’s time to protect it with a clear coat.
✅ Why a Protective Sealant Is Necessary
- Seals in the paint, preventing peeling and fading.
- Adds a glossy or matte finish, depending on your preference.
- Provides UV protection to prevent sun damage.
✅ Choosing the Right Clear Coat
- Use a UV-resistant, waterproof clear coat to ensure long-lasting durability.
- Spray-on clear coats work best for even coverage.
Let the clear coat dry completely before moving on.
Step #7: Stop! – Let the Paint Cure
Even if the paint feels dry, it still needs time to cure properly.
✅ How Long Should You Wait?
- Most paints take 24-48 hours to dry completely.
- For best results, wait 5-7 days before taking the kayak out on the water.
✅ Tips to Speed Up the Curing Process
- Keep the kayak in a warm, dry area with good airflow.
- Avoid touching the surface too much while it cures.
Step #8: Clean and Wax Your Kayak
Now that your kayak is painted and fully cured, there’s one last step—polishing it up for a sleek, professional look!
✅ Final Cleaning & Touch-Ups
- Gently wipe the kayak with a soft cloth to remove any dust.
- If needed, do any final touch-ups with a fine brush or paint marker.
✅ Waxing for Extra Protection
- Applying a marine-grade wax helps protect the paint from scratches, dirt, and UV rays.
- Use a soft cloth or sponge to buff the wax into the surface for a smooth, shiny finish.
And that’s it—you’ve successfully painted your kayak! With the right preparation, technique, and patience, your kayak will not only look amazing but also stay protected for years to come.
Now, grab your paddle and show off your freshly painted kayak on the water!
How to Paint a Kayak: Summary
Painting a kayak is a great way to refresh an old, faded boat or customize it with a unique design. By following the right steps and using the best materials, you can achieve a professional-looking, long-lasting finish. Here’s a quick recap of what we covered:
Step-by-Step Guide on How to Paint a Kayak
1️⃣ Prepare the Area – Choose a well-ventilated workspace and protect the ground.
2️⃣ Strip It Down – Remove any parts that don’t need painting and mask off important areas.
3️⃣ Clean & Sand – Wash off dirt, grease, and old residue, then sand the surface for better paint adhesion.
4️⃣ Wipe It Clean – Remove any sanding dust with alcohol or acetone.
5️⃣ Paint the Kayak – Apply thin, even layers of paint using a brush, roller, or spray paint.
6️⃣ Apply a Clear Coat – Protect your new paint job with a UV-resistant clear sealant.
7️⃣ Let It Cure – Allow at least 24-48 hours for drying, but longer for best results.
8️⃣ Clean & Wax – Polish your kayak with a marine-grade wax for extra protection and shine.
Insider Tips for Picking the Best Paint for Kayaks
- Use marine-grade, plastic-friendly, or epoxy-based paint for durability.
- Spray paint provides smooth coverage, while brushes and rollers work well for detailed areas.
- Opt for UV-resistant paints to prevent fading from sun exposure.
DIY Solutions for Common Painting Mistakes
- Uneven paint? Lightly sand and add another thin coat.
- Drips or runs? Let it dry, sand the spot, and repaint.
- Peeling or flaking? Ensure you’ve sanded and primed the kayak properly before painting.
Special Techniques to Customize Your Watercraft
- Use stencils and decals to add patterns, logos, or personal touches.
- Try layering colors for a unique gradient or camo effect.
- Add reflective tape for increased visibility in low-light conditions.
Easy Care Tips Post-Painting for Enhanced Longevity
- Store your kayak in a shaded area to prevent UV damage.
- Rinse it with fresh water after each use to remove dirt, salt, or debris.
- Apply wax periodically to maintain the shine and protect the paint.
- Check for scratches or chips and touch them up as needed to keep your kayak looking great.
Final Thoughts
With the right approach, painting your kayak can be a fun and rewarding DIY project. Whether you’re restoring an old boat or making it your own with custom designs, a little time and effort can go a long way in transforming your kayak. Now, grab your paddle and hit the water in style!
Also Read
Old Town Fishing Kayak: The Ultimate Guide Exciting Features, and Tips
How Much Does a Kayak Weigh? Discover the Surprising Truth
How Much Does a 16×32 Kayak Pool Cost? Discover the Affordable Luxury